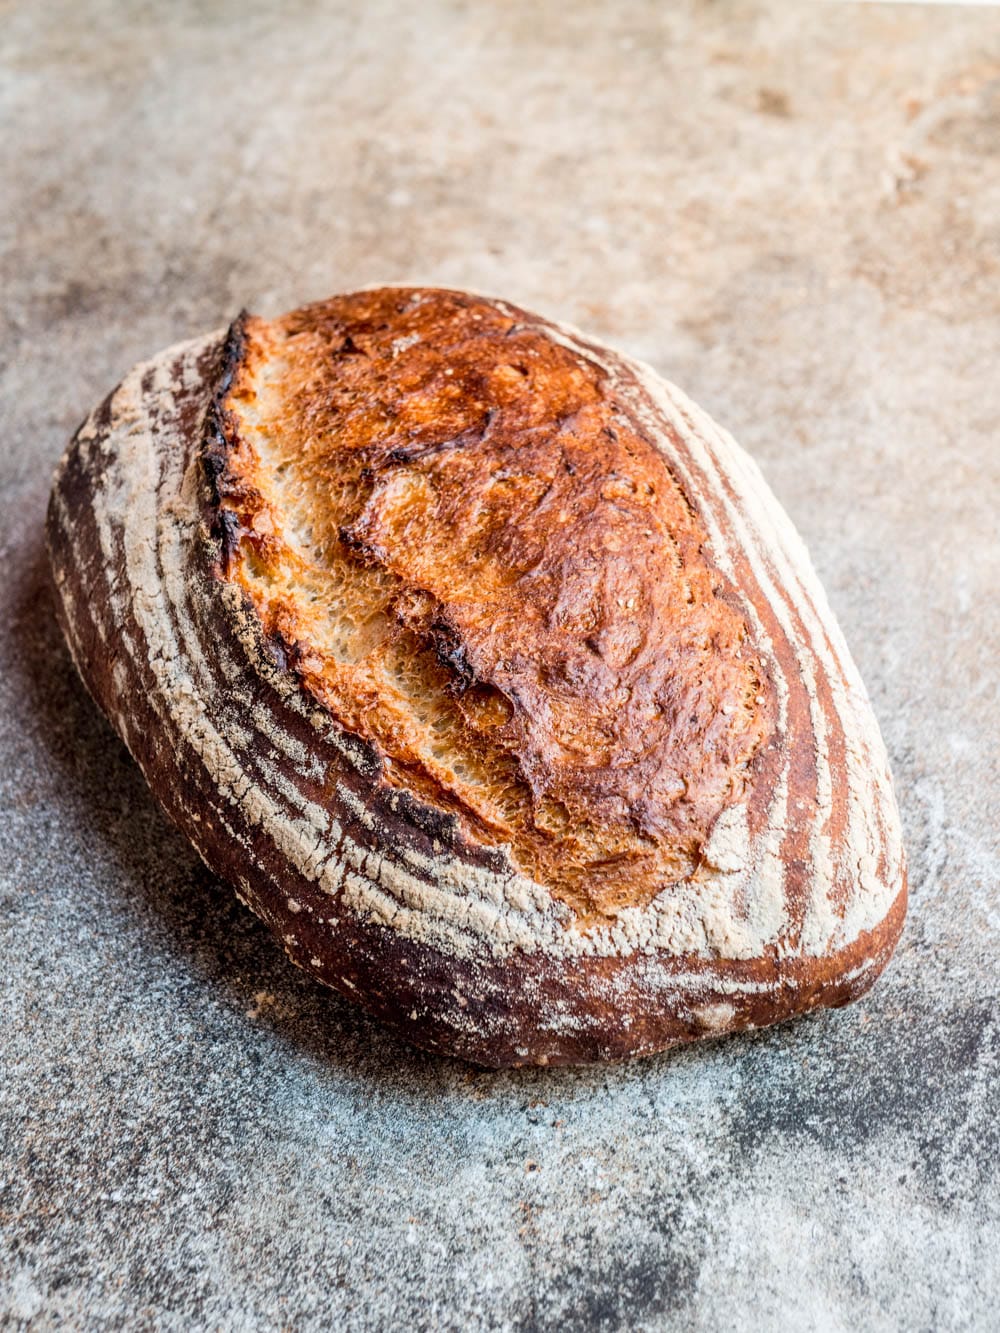

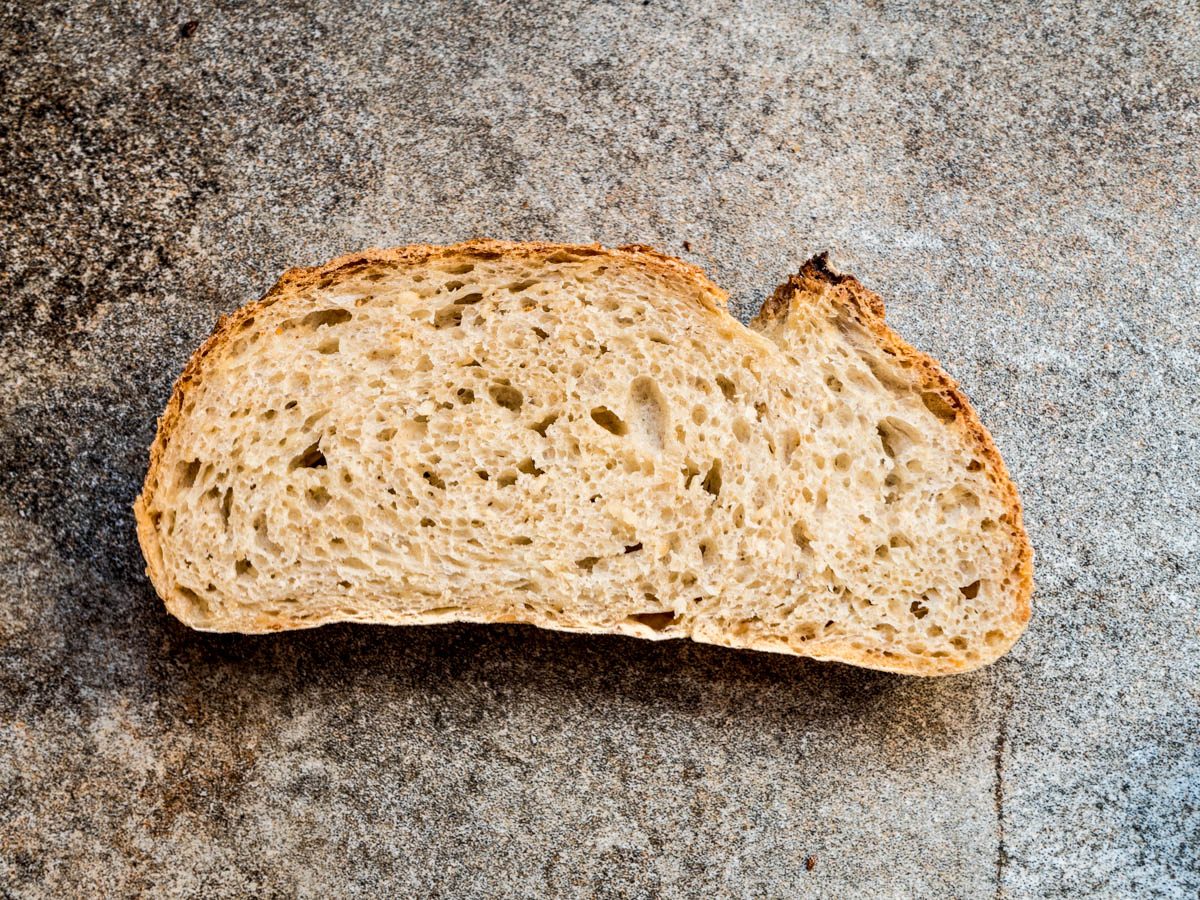
I’ve been making this bread a lot recently. It’s based on the same principles as the wholesome no knead bread, but it is lighter and has a different flavour base. I guess this falls within the scope of “white bread”, though I never use 100% white bread flour. On its own, it’s too plain, too boring, unless you load up on the milk or butter for milk bread or brioche.
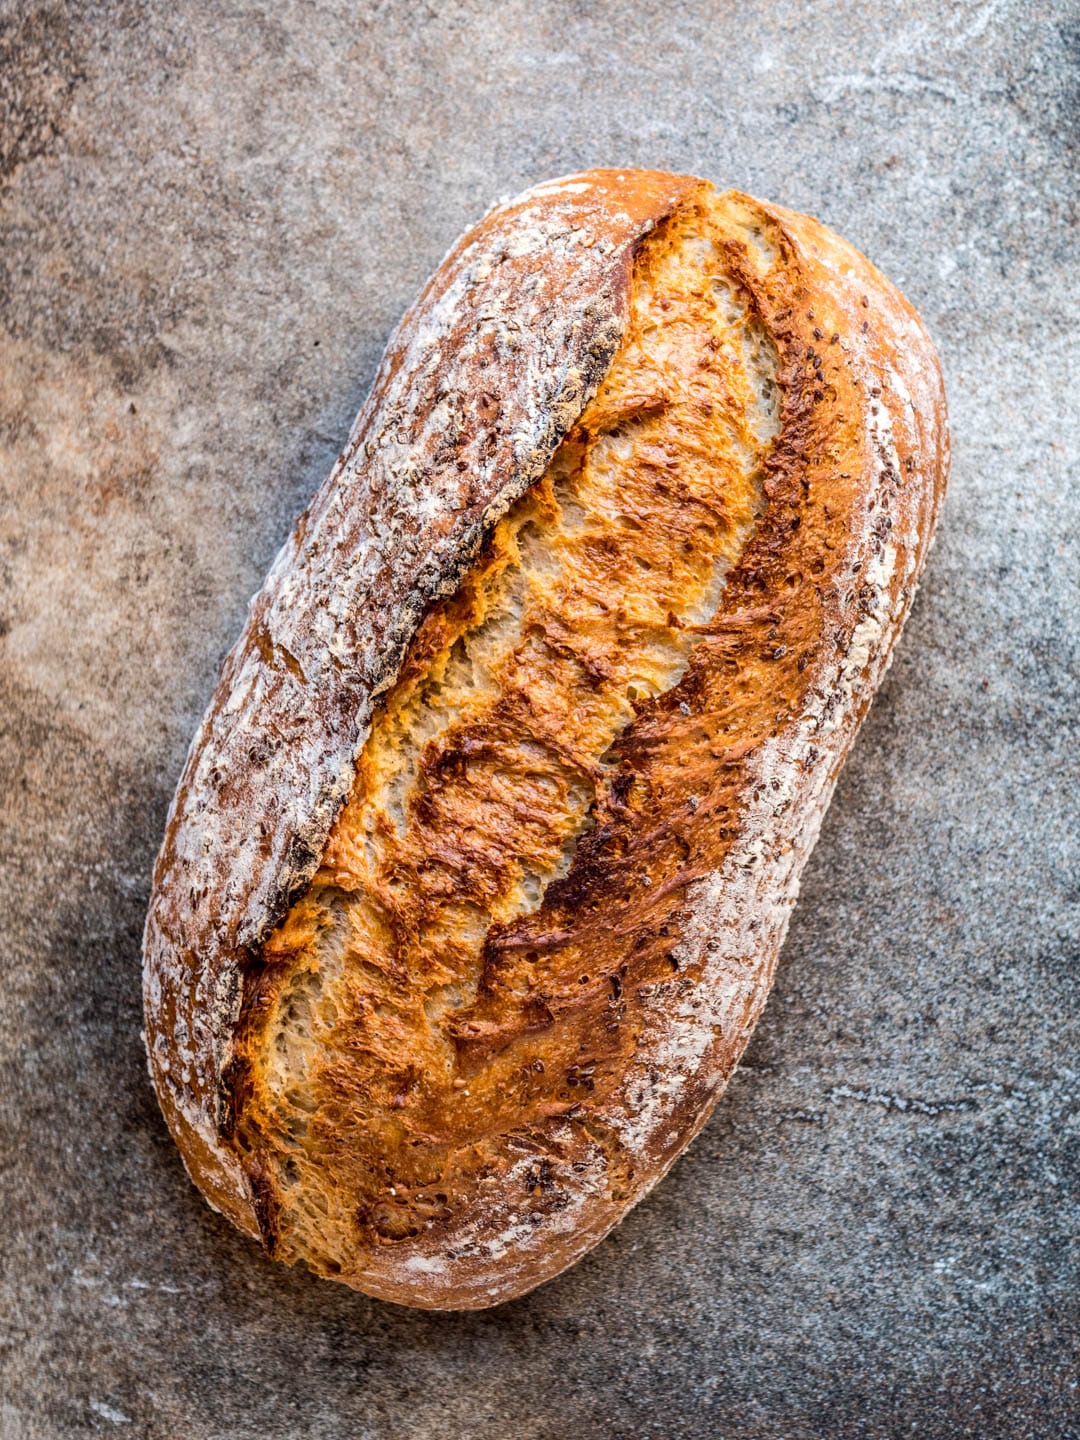
I therefore always add a little rye flour to my white loaves. Not enough to call it rye bread. Enough, however, to achieve a more flavoursome and moist bread, with a nicer crumb. Recently, I’ve taken to adding sesame seeds as well. They bring out even more flavour and also makes the bread as suitable for the dinner table as for the weekend breakfast or brunch.
If you didn’t already, do have a browse through the introduction to my post on the wholesome no knead bread. It gives a little more detail on the equipment I use (and what you can use if you don’t have it) as well as a few tips. While the method below should be clear, I find things are usually easier when you understand not just what is to be done, but also why. I’ve also included a video which shows how I fold and shape the bread. The voice-over is in Norwegian, but it should still help in visualising some of the key elements of the method.
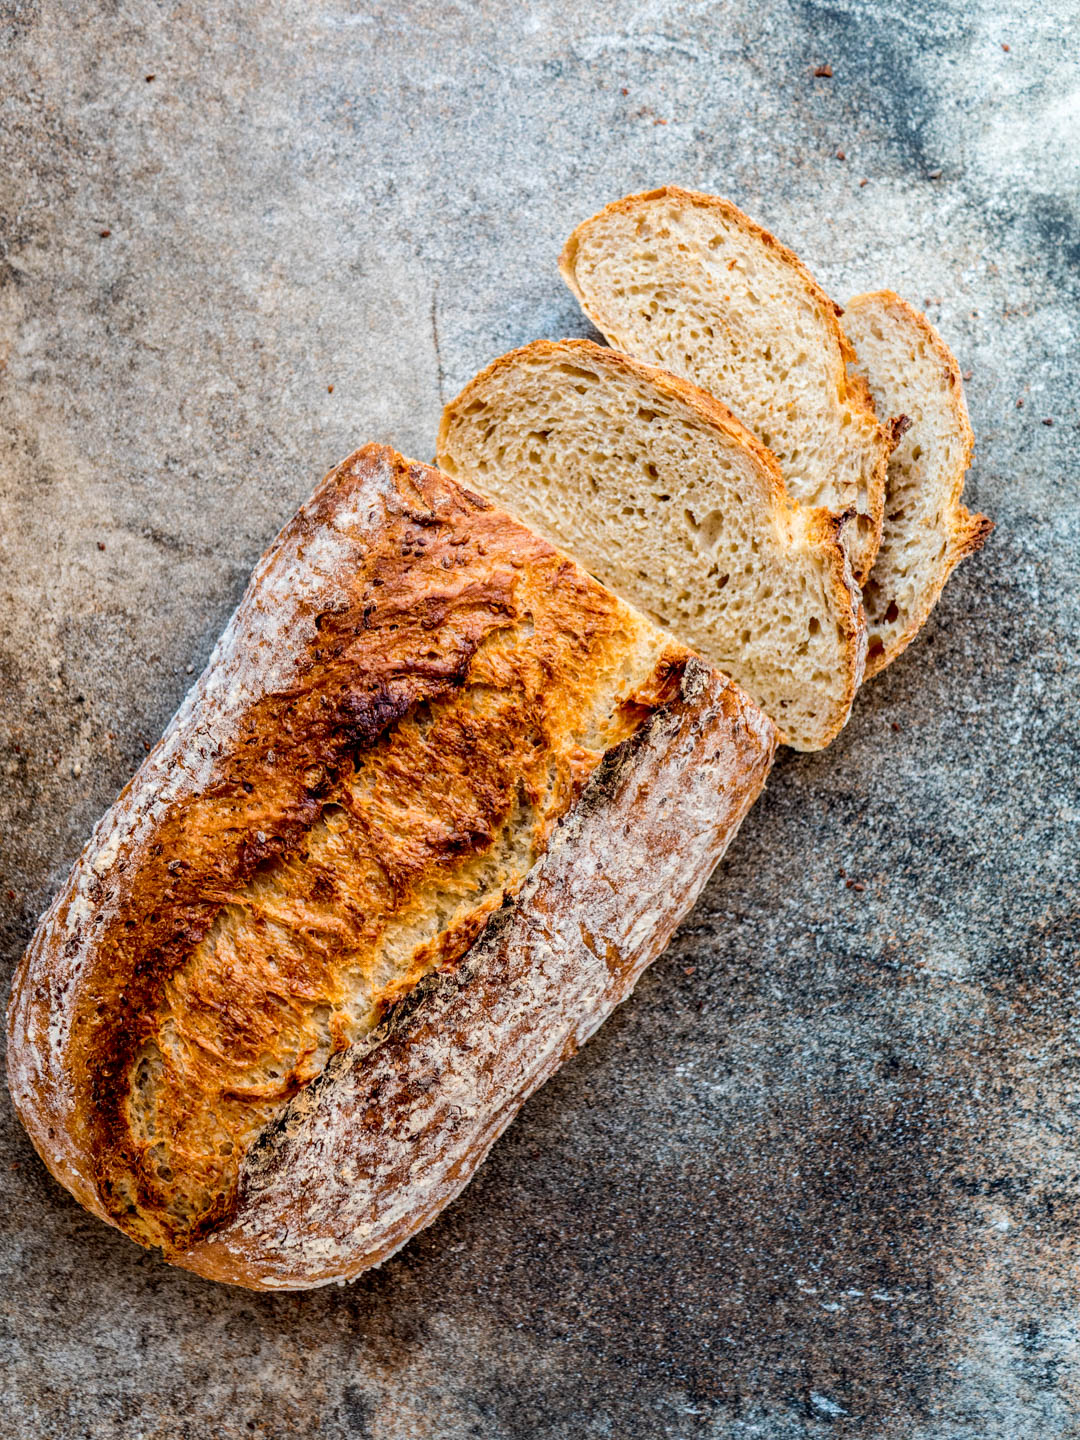
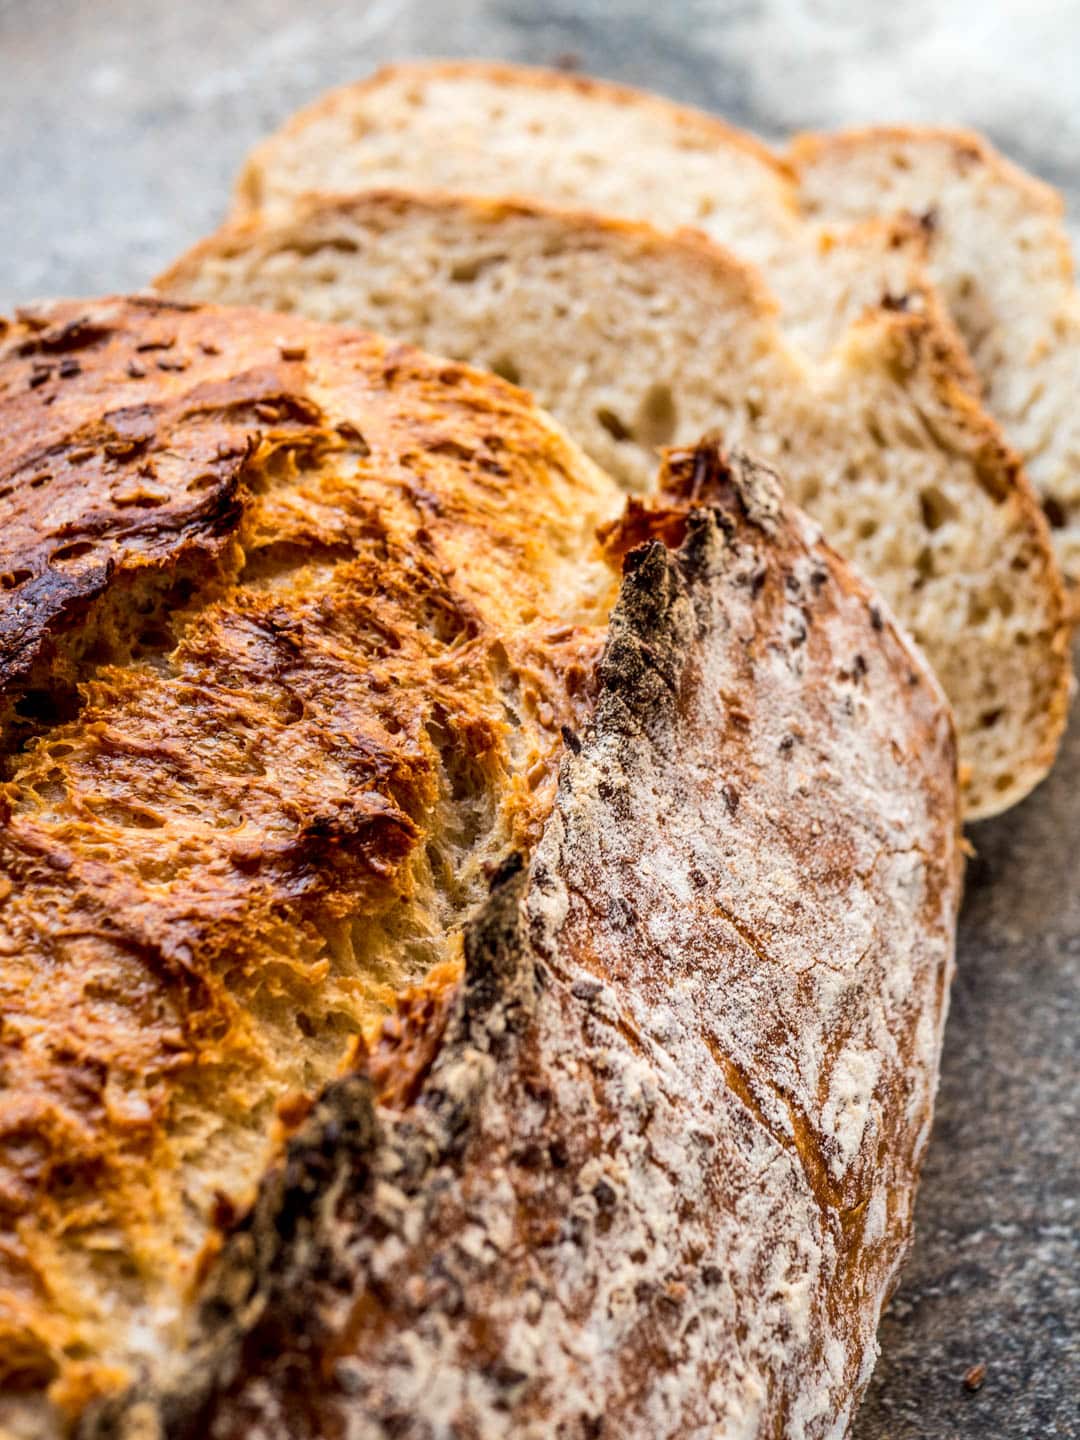
The bread keeps well at room temperature for a couple of days and can be frozen. (Never refrigerate bread – it’ll make your bread go stale almost instantly.) I leave mine on the wooden chopping board I use to slice bread, cut side down (opposite end up in the air). I never wrap it in anything. This helps the bread keep a nice and crunchy crust. From the moment you slice it, it’ll last around 24 hours before starting to go a little dry. It’ll keep moist for longer if you wrap it in plastic, but that’ll soften the crust, which will then lost most of its wonderful flavour. The recipe yield is for one large loaf, but you can easily double the recipe to make two loaves.
Ingredients
- 450 g strong white bread flour, plus extra to bake
- 50 g rye flour
- 50 g sesame seeds
- 10 g salt
- 1-2 g fresh yeast, or ¼ tsp instant (fast action) dried yeast
- 390 g water, not warmer than room temperature
- 1 Tbsp each rice flour and white flour, or wholemeal flour, for the proofing basket
How I make it
- Mix all the ingredients except the 1 Tbsp each of rice and white flour well. Cover with plastic wrap or a tight-fitting lid and leave to rise for 8-12 hours, for example over night.
- Place the dough on an unfloured surface. Sprinkle a little flour on top and turn the dough to face floured side down. Gently stretch the dough to a rectangle and fold from each side approx. 2/3 across, as if making an envelope. Roll over so the cut side is down and gently shape to a circular shape. Cover with a kitchen cloth and leave to rest for 20-30 minutes. See “Del 1” (part 1) of the video below for a demonstration of how I usually do this.
- Mix the 1 tbsp each of rice and white flour and sprinkle a good amount in a proving basket. Add a small handful of sesame seeds too, if you like.
- Sprinkle a little flour over your shaped dough, which should have relaxed and spread out a little by now. Shape the loaf to a bread (see video “Del 2” (part 2) for how I do this). Place seam-side up in the proving basket. cover with a kitchen towel and leave to rise until nearly doubled in size, 1-3 hours (depending on dough and room temperature).
- At least half an hour before you’re ready to bake the bread, place a baking stone (if you have one) in the oven and leave at
 260 °C for at least half an hour. If you like, place an old sheet pan at the bottom for splashing hot water into (this creates steam that helps the bread rise better during baking). If you don’t have a baking stone, it is sufficient for the oven to get thoroughly hot before baking.
 - Invert the bread onto something suitable (such as a wooden chopping board) or directly onto the baking stone (if your oven enables you to pull it out slightly without having to lift it off). Make an incision into the bread to allow it to rise properly in the oven. Have a look at the video (“Del 3” (part 3)) for how I do this. Transfer to the oven immediately and throw in around 125 ml/½ cup of hot water into the old sheet pan at the bottom of your oven. Close the oven door immediately to ensure no steam escapes.
- Lower the temperature to230 °C and bake for 20 minutes. Open the oven door to let out any steam. Continue to bake until the bread is cooked through, 10-20 minutes or more depending on your oven and whether or not you’re using a baking stone. The bread is ready when it has reached a temperature of at least 96 °C all over (the coldest point is usually a short distance above the crust on the underside). When ready, the bread will return a hollow sound if you knock on the crust on the underside. Leave to cool on a rack to cool completely before slicing. If you slice it while still hot, steam will escape and you may ruin the texture of the crumb.