


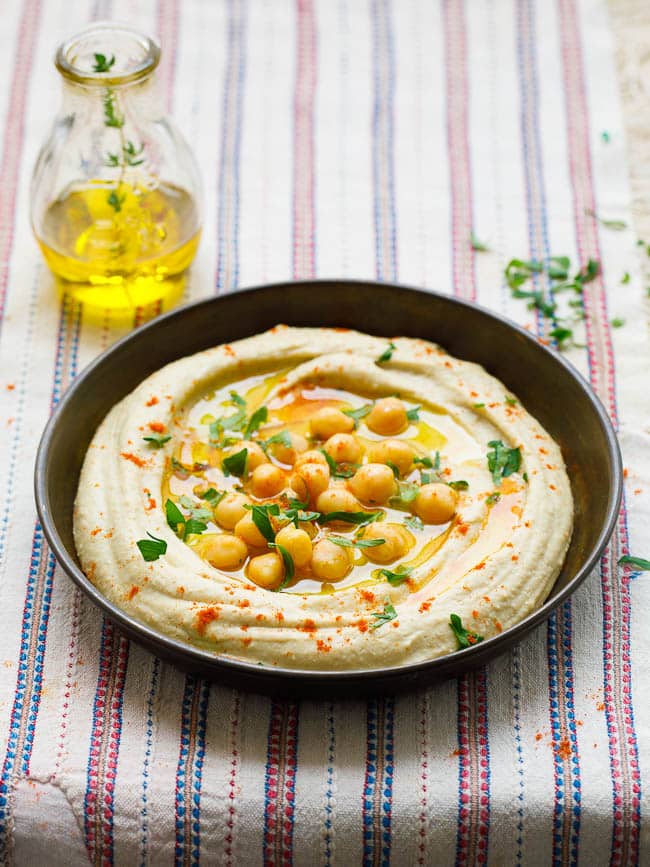
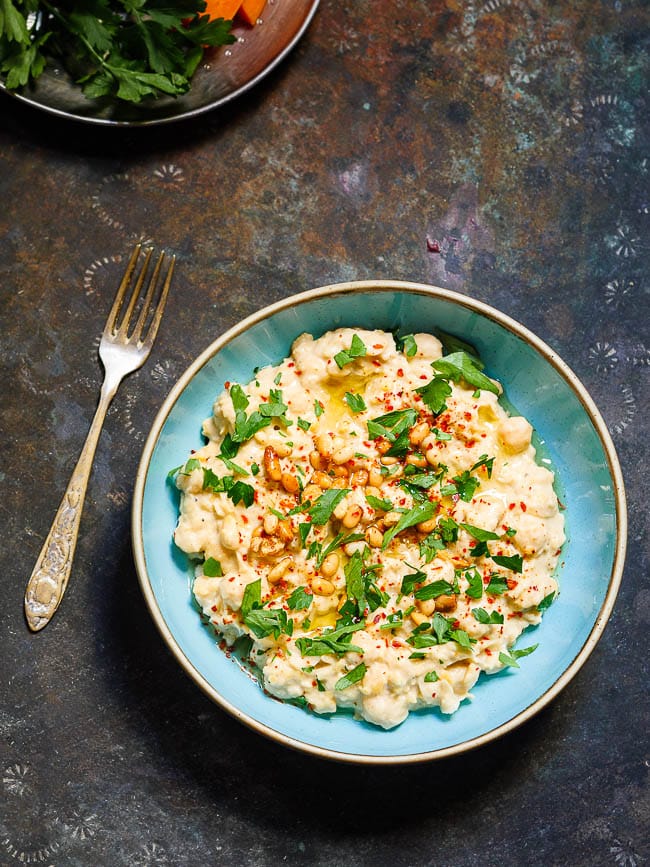
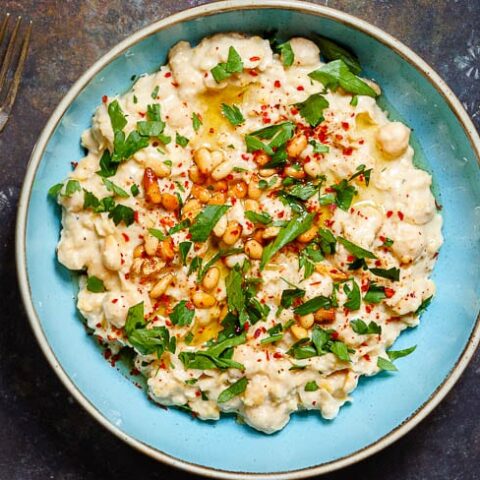
Where the perfect hummus is silky smooth and creamy, musabaha (or masabacha) is its more rustic cousin. The ingredients are more or less the same, yet the end result is completely different. Musabaha, best described as warm chickpeas in tahini sauce, firmly proves that cooking isn’t all about ingredients. The method matters, too.
If you like hummus, musabaha is surely for you. Also known as msabaha, mashawsha or masabacha – depending on where in the Middle East you happen to be – this dish is loved by millions.
It’s most commonly eaten for breakfast. I can hardly think of a more warming and nutritious start to the day!
What is the difference between hummus and musabaha?
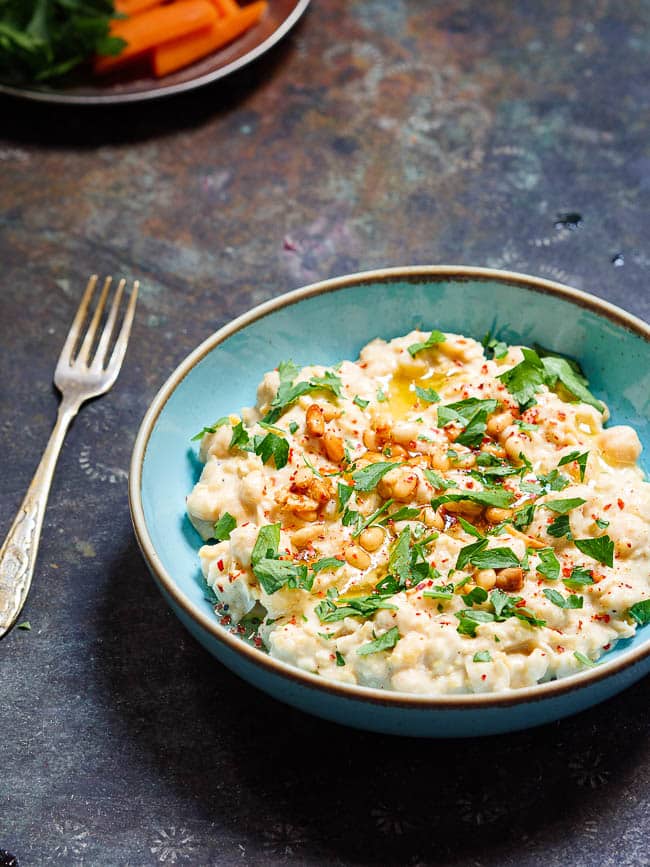
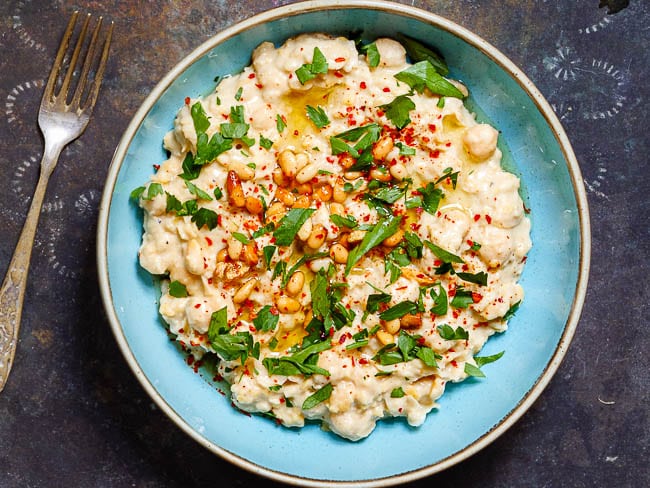
The biggest difference between hummus and musabaha is the texture. While hummus is completely puréed and smooth, musabaha is decisively chunky.
Just how chunky depends on the cook. Some like it fairly mashed, others keep most of the chickpeas whole.
Whichever way you like it, the chickpeas do not completely blend with the tahini sauce. I think of the dish as warm chickpeas in tahini sauce. Indeed, its arabic name simply means “swimming”. The chickpeas should be swimming in sauce, not completely blended into it.
This means the flavourings of the sauce become more prominent. Not necessarily in absolute amounts, but their flavours are more pronounced when not completely mashed in with the chickpeas.
I use considerably less tahini when making musabaha than when making hummus. This is true of most versions. You simply need much less tahini to achieve the sort of flavour that is required here.
The sour flavours, and I think here primarily of lemon, are usually more pronounced in a musabaha. Of course, many also like a good punch of acidity in their hummus as well. But where hummus can also be served creamy and decadently, a certain level of acidity is needed in a good musabaha.
Another major difference is that msabbaha is served warm. True, there are versions of hummus that are served warm too, such as in parts of Turkey. But they are the exception. For msabbaha, it’s the rule.
This is a warming and nutritious Middle Eastern breakfast, not a meze.
I’d also argue that while hummus is also brilliant with any toppings, for msabbaha they’re necessary for that extra punch of flavour. Although I love hummus topped with spiced meat, for example, I tend to have mine plain. A little olive oil and a small scattering of flat-leaf parsley on top is more than enough for me.
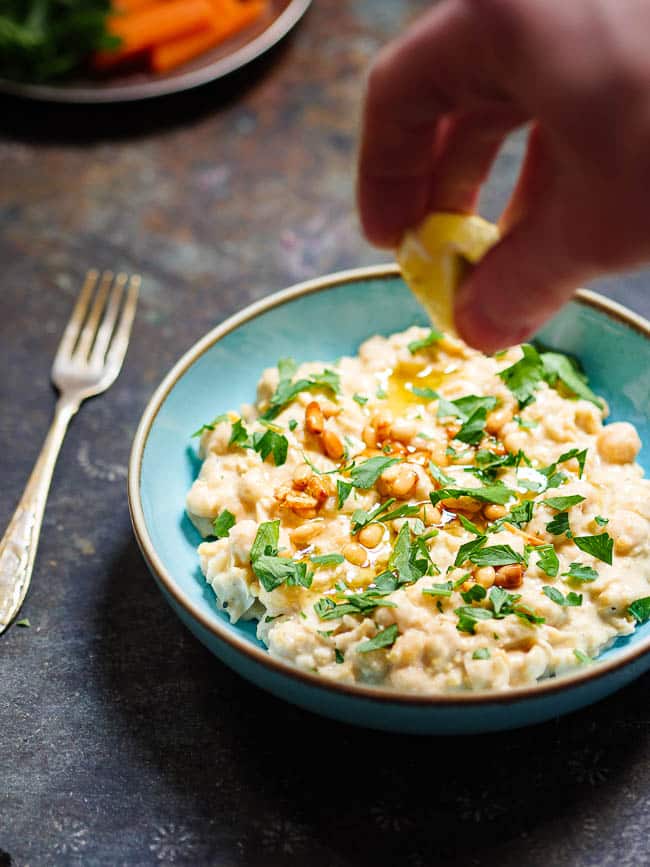
For msabbaha, the topping needs to pack a punch. I like golden, crispy fried garlic and pine nuts, like I’ve suggested here. But you can venture beyond. Melted butter, crispy nuts or hot sauce are common condiments in Syria and Lebanon.
The key to a perfect musabaha
Making msabbaha is super simple. There are a few elements that are worth keeping in mind when making it, though.
The chickpeas
I usually make musabaha when I’ve just boiled a big batch of chickpeas. Herein lies the first key to a tasty musabaha: Boil the chickpeas yourself.
If you’ve not eaten a whole lot of chickpeas in your life, tinned are probably fine. You’ll be able to make this dish in minutes, and you won’t have to worry about soaking or cooking the chickpeas.

But there’s a reason that in Turkey – and I suspect most countries in the Middle East, too – the supermarket stocks of dried legumes far outnumber those of canned. The people who eat a lot of chickpeas simply prefer to cook them from dried.
Once you start having them more and more often, you’ll find that cooking your own chickpeas from dried isn’t actually that much of an effort. And the flavour and texture is significantly better. You’ll even start noticing small nuances between different brands of dried chickpeas.
In fact, you can start adapting the cooking time according to what you’re making. Super soft chickpeas for hummus or msabbaha. Firmer for ones that are to be fried. Somewhere in the middle for the salads.
I usually cook plenty more than I need for a single dish – at least 500 g of dried legumes in one go. They keep well for up to a week in the fridge, stored with their cooking liquid in a sealed container.
I also like to keep some in the freezer for instant access at any time. I usually drain them and store in a good quality, sealable freezer bag. This way, you can easily break up the chickpeas while frozen and take exactly what you need.
That said, it’s true that some ready versions aren’t bad. Especially the jarred ones from the deli rather than the tinned from the big chain supermarket. I’ve given instructions for cooking your own below, but the choice is entirely yours.
The texture
Whatever chickpeas you’re using, make sure you don’t crush them too hard. Musabaha is a chunky affair.
As ever, opinions are divided as to how chunky it should be. Some versions may resemble a rough hummus, others leave most of the chickpeas completely intact.
I like using a fork to break up the chickpeas in their sauce. This is of course slow compared to using an electrical device, but it doesn’t take more than a minute or two. And it leaves me in complete control of the chunkiness of my warm chickpeas.
I usually keep going until it thickens, almost porridge-like. Yet, it should remain far from homogenised. There are always plenty of whole chickpeas remaining.
The condiments
As should be clear by now, msabbaha is served warm.
And by warm, I mean warm. Not scorching hot.
Once cooked, leave the warm chickpeas to settle for a few minutes before making your musabaha. Once you’re ready to serve, the mixture shouldn’t be so hot that you couldn’t gulf it all down in a minute, if you wanted to.
Perhaps most crucially of all, make sure you have a tasty topping for your musabaha! I’ve given a few ideas above. Or you can just follow the instructions for my favoured topping in the recipe below.
Whatever you choose, I’d argue it should include a range of flavours and colours. A little acidity (lemon juice, sumac), a little fat (olive oil, butter), some freshness (herbs, veggies) and perhaps a sprinkle of heat (fresh or dried chili).
How to serve masabacha / musabaha
In Lebanon, Palestine and other places in the Middle East where it is a beloved food, musabaha is usually eaten for breakfast. Boiled eggs and fresh bread are typical accompaniments. Perhaps even a chopped salad.
While more than one of my friends have claimed I must have been Middle Eastern in my previous life, warm chickpeas are a little too much for me at breakfast. I have musabaha for lunch. Or as a light and simple dinner if eating alone.
Still, I don’t mess with the way it’s eaten.
I always make sure to have fresh, crusty bread alongside. I love sourdough, but softer more Middle Eastern style breads such as pita or lavash are also great.
Since I don’t have it for breakfast, I usually skip the eggs. But I always make a crunchy salad to go alongside.
In winter, that means chopped winter veggies. This time, I simply cut som carrots and turnips into batons that I put onto a plate alongside some rocket. On top, a generous drizzle of pomegranate molasses or sumac and good quality extra virgin olive oil. Delicious!
In summer, I opt for a traditional chopped salad of tomato, cucumber and onions, with a generous squeeze of lemon juice and a mild extra virgin olive oil. Delicious!
The recipe yields 2-3 servings, depending how hungry you are and what else is being served alongside.
Musabaha (Masabacha) – Warm chickpeas in tahini sauce
Ingredients
- 500 g cooked chickpeas, from 200 g/1 cup dried chickpeas, soaked and cooked (recommended – see notes for my method) or 2x400 g/14 oz tinned, rinsed and drained
- 125 ml chickpea cooking water or drinking water
- 50 g tahini
- 1 tsp ground cumin
- 1 Tbsp lemon juice, or to taste
- salt and pepper
Chickpeas (if cooking from dried)
- 200 g dried chickpeas
- 1 bay leaf
- 1 whole garlic, cut in half horizontally (no need to peel)
- water
- salt
Topping
- 3 Tbsp extra virgin olive oil
- 20 g pine nuts
- 3 garlic cloves, thinly sliced
- 1 handful flat-leaf parsley, finely chopped
- 1 tsp pul biber (Aleppo pepper), or to taste
- salt and pepper
How I make it
- If your chickpeas aren't warm, heat them gently in water.
- Add the chickpeas to a bowl along with 125 ml (½ cup) of the cooking water as well as the tahini, ground cumin and lemon juice.
- Using a fork, roughly mash until the texture is to your liking. Season to taste with salt, pepper and more lemon juice, if you like. Add the msabbaha to individual serving bowls (or a large communal one).
- At the same time, heat 3 Tbsp extra virgin olive oil, pinenuts and thinly sliced garlic cloves in a small saucepan over medium heat. Fry until golden, but not burnt, stirring constantly. It should only take a minute or two. Do this at the very last minute, as the garlic and pine nuts will continue to cook in the hot oil if you don't immediately add it to top your msabbaha.
- Add the oil, pine nuts and garlic topping to the bowl(s) of msabbaha, then top with flat-leaf parsley and chili flakes. Serve at once.
Tips & notes
-
Place the chickpeas in at least 3x the volume water. Add a generous teaspoon salt. Leave to soak in a cool place for at least 8 hours, or overnight. If your kitchen is very warm or you’re planning to leave them for more than 12 hours, place them in the fridge.
-
Drain the water from the chickpeas. Add fresh water to cover by 2-3 cm and another teaspon salat. Bring to the boil and boil hard for 3-4 minutes while skimming the foam off the surface. Turn the heat down to low, bringing the water to a slow simmer with only slight movement on the surface. Add the bay leaf, garlic and olive oil. Leave to simmer like this until the chickpeas are completely tender. It may take anything from 20 minutes to several hours, depending on your chickpeas, but they’re usually done in 30-45 minutes. Keep a close eye on it and test regularly. When satisfied the chickpeas are done, take off the heat and discard the bay leaf and garlic. Note the chickpeas may cook a little unevenly, so make sure to check at least three chickpeas before taking off the heat.


2 responses
This is soooo delicious & easy!!
I love hummus and this looks really good!