Ingredients
- 675 g strong white bread flour
- 325 g wholemeal flour
- 20 g salt
- 4–6 g fresh yeast, or 1-2 g instant (fast action) dried yeast
- 780 g water, at c. 20C/68F
- 3 Tbsp rice flour/white flour 50/50 mixture, or wholemeal flour, to line the proofing baskets
- 150 ml hot tap water
How I make it
- If using dried yeast, check package instructions for activating the yeast before making the dough.
- Mix the dry ingredients and crumble over the yeast. Add water and mix well until there are no traces of flour. I use a sturdy wooden spatula for this, use your hands if you like. The dough will be very sticky. Cover with plastic wrap or a cover and leave to rise for 6-12 hours.
- Turn the dough onto a clean, unfloured work surface. Sprinkle a little flour over the dough and split it into two equally sized halves. Using a dough scrape, flip the two doughs so the floured surface faces down. Fold the edges of the dough towards the middle as if you were making an envelope. With the last move, roll the dough so the side with the folds faces down. Sprinkle a little flour over and leave to rest under a kitchen towel for 20-30 minutes. Usually doing this once is enough, but if the dough has flattened and spread out a lot, repeat the folding process and leave to rest for another 20-30 minutes before continuing.
- Mix equal parts of rice flour and white flour (or use wholemeal flour) and line the proofing baskets with plenty of the mixture. If using regular bread tins, cover with a kitchen towel lined with plenty of the flour mixture.
- When ready to shape the breads, sprinkle the doughs with a little flour and brush off any excess. Flip and shape into a batard, i.e. a bread shape. There are many ways of doing this, see “How to shape a bread” in notes below for my method. Once shaped, place in the proofing baskets, seam side up. Sprinkle a little flour on top, cover with a kitchen towel and leave to rise until doubled or nearly doubled in size, 2-3 hours. If you’re in a hurry you may do it after 1 hour. Your bread will still be great, though the texture may be a little on the bouncy side.
- Place the baking stone (if using) in the second lowest rack. Preheat the oven to
 260 °C, or as hot as it goes if less. Make sure to do this at least 30–45 minutes before to ensure the baking stone gets sufficiently hot. If using a regular oven tray you only need to make sure the oven is properly hot before baking. Place a tray at the bottom of the oven to splash the water onto.
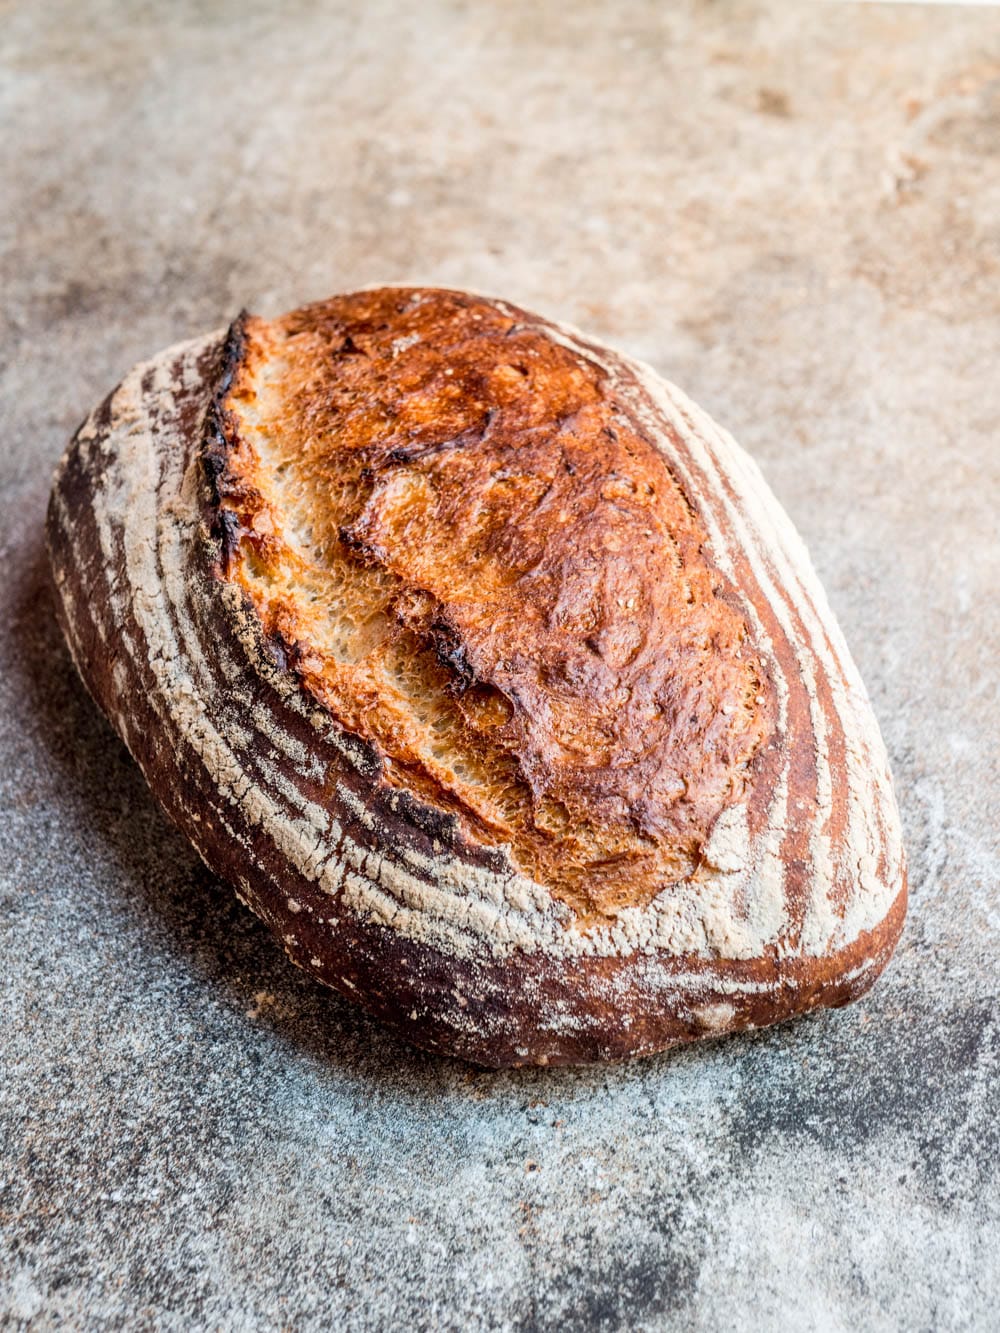
 - When ready to bake, cover a pizza spade with baking parchment (or use something else you can use to slide the bread into the oven with). Invert the breads onto the baking parchment. Make a 3-4 cm (1-1.5 in) deep incision along the length of the top of the bread at a near horizontal angle. This ensures the dough will rise beautifully in the oven rather than exploding where it feels like. Transfer to the baking stone as quickly as possible. Throw the hot water into the tray at the bottom of the oven and immediately close the oven door immediately. Lower the temperature to230 °C and bake until golden and cooked through, 35–40 minutes. Open the oven door to release steam after approximately 20 minutes. If you're unsure if the bread is done, insert an oven thermometer. The breads are done when they've reached 96 °C-98 °C.
- Leave to cool completely before slicing the bread.
Video
Tips & notes
How to shape the breads
The point of shaping the breads before baking is to create a tension in the surface of the dough. This way, it’ll rise and keep its shape nicely. It is important to work relatively quickly, otherwise it may get a little messy. Use a little flour if you must, but try to use as little as you can, otherwise you’ll get visible flour lines in the bread.
- Sprinkle a little flour on the dough and, using your hands, brush away any excess. Flip so the floury side faces down.
- Grab the side furthest away from you, stretch it a little and fold it around 1/3 of the way towards the middle. “Glue” the edges to their new place by gently pushing with your fingers.
- Grab each of the left and right corner furthest away from you and fold in towards the middle. Again, “glue” the edges to their new place by gently pushing with your fingers.
- Repeat the first movement (folding the side furthest away from you towards you) until you have a bread-shaped roll.
- Gently roll with your hands and place in the proofing basket, with the final seam facing up.
Did you make this recipe?I'd love it if you'd be kind enough to leave a rating and a short comment.